


Vehicle and annotations
In this post we’d like to walk you through the main elements of High Mobility’s car simulators UI and their key features.

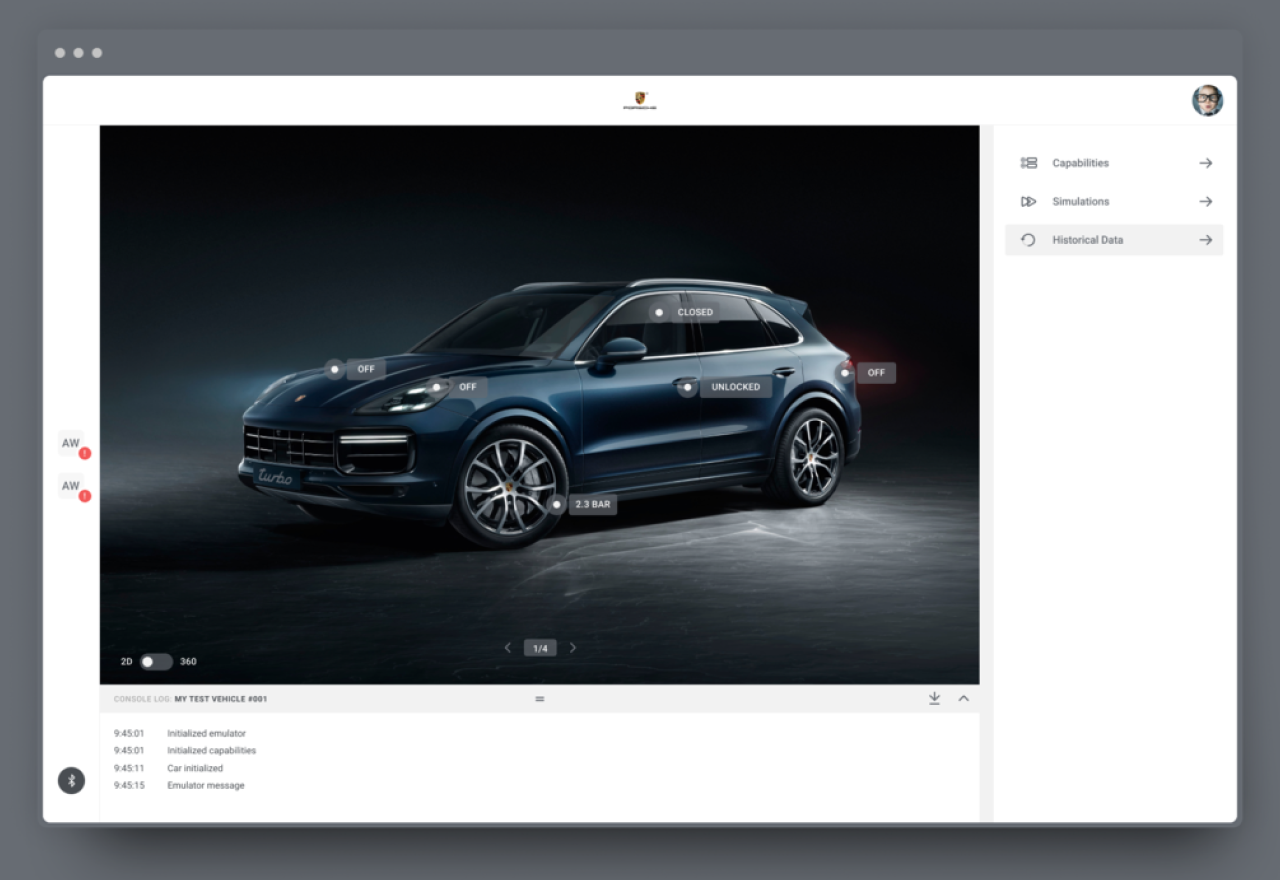
The majority of the car simulator UI is occupied by the vehicle. The reason behind the decision to provide a graphical representation of a car (either via 2D images or a 360 degree view) was to simplify understanding and allow users to grasp the concept quickly. Developers who are familiar with building mobile applications for different device configurations may find this approach familiar. In terms of their hardware and software configurations, the car simulators should provide a kind of a light digital-twin to the real vehicle.
You’ll notice that some of the data points have actually been mapped right onto the vehicle. These are interactive and communicate the actual state of the feature pinpointed. The reason for this is, again, to remove any mental blocks that might otherwise occur when deep in the development process.
Functions
In the right-hand menu you will find Capabilities, Simulations and Historical Data.

Capabilities
This menu lists either the full Auto API or a subset of it, depending on the type of simulator. Users can manipulate the state of the emulated car in this section - and all changes are automatically stored as the latest state of the car, just like a real vehicle. For instance, if the user sets the EV battery charge to 20% in one session, it will be the same value when opening the simulator again.
Simulations
Users can create a driving scenario and play it back here. During playback, the vehicle state is updated every few seconds, and it’s possible to monitor these changes from your application using the Auto API. Each simulation can be played over and over - try adjusting the gaps between events without altering the exact timestamp to fine-tune your troubleshooting sessions.
Historical data
The Historical Data feature allows users to create/load a predefined driving cycle using the different capabilities, but unlike in Simulations, instead of the state of the vehicle being updated every few seconds, an application can query for the state changes in the last 24 hours. With each sequence of events that users may be building, they are essentially asking the vehicle - “tell me everything you did and where you went during the defined time frame.”
Connected applications menu
Here all applications that request access or have been already verified to connect to the simulator are listed. Users can open each application menu separately and copy the access tokens and code samples for their preferred device platforms.

Access Token
Use the access token to download access certificates to authorise the device or client. Code samples for iOS and Android are also provided.
Permissions
Shows which data points the application has requested access to.
Device Certificates
Enables you to create device IDs and authorise them to access the car emulator.
The console
Here you’ll see a recording of every event experienced by the car simulator. This is especially useful for troubleshooting as the console log notifies the user of every data transmission coming in or going out of the vehicle.

You should now be familiar with the main sections of the simulator user interface. If you have any questions, don’t hesitate to get in touch.
